
Make Your Own Kajal | Ayurvedic & Natural Method
Kohl, another name for kajal, has long been a staple of Indian beauty practices. According to ancient beliefs, kajal, which is traditionally manufactured at home with natural materials, not only improves the eyes but also shields them from dust, diseases, and even the evil eye. Kajal is more than simply a cosmetic in Ayurveda; it is a calming, healing concoction that nourishes the eyes.
Commercial kajal preparations nowadays are frequently laden with artificial coloring, chemicals, and preservatives that can aggravate sensitive eyes. An inexpensive, natural, and safe substitute is to make kajal at home with Ayurvedic techniques. Additionally, using ingredients from your home to make your own makeup is immensely fulfilling.
This article will walk you through the benefits of making your own kajal, how to store and utilize it, and a classic Ayurvedic recipe.
Why Choose Homemade Kajal?
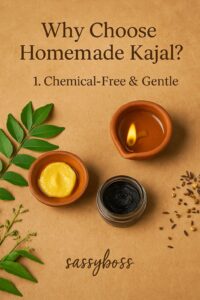
Before we dive into the recipe, let’s understand the advantages of making kajal at home:
1. Chemical-Free & Gentle
Synthetic chemicals, parabens, and unnatural perfumes are not present in homemade kajal. Because of this, it is safe for both adults and babies and kind to delicate eyes.
2. Rich in Antioxidants
In addition to giving kajal a smooth texture, adding ghee (clarified butter) or almond oil nourishes the eyes. These antioxidant-rich compounds aid in lowering inflammation and dryness.
3. Soothes and Protects
Ayurveda claims that certain of the substances used in traditional kajal, such as camphor or castor oil, offer calming and cooling effects. They lessen puffiness and shield the eyes from infections.
4. Customizable
You may customize your kajal by adding almond oil for more nourishment, camphor for cooling, or even activated charcoal for deeper pigmentation.
Ingredients You’ll Need
The most basic and traditional recipe uses just a few ingredients:
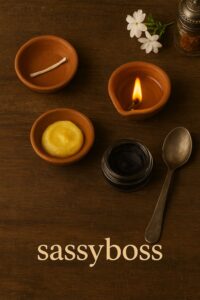
Basic Ingredients:
• A cotton wick (or a cotton ball)
• Ghee (clarified butter) – 1 tablespoon (preferably homemade)
• A diya (earthen lamp) or small metal lamp
• A steel plate or bowl
• A spoon or spatula for scraping
• Castor oil or almond oil – a few drops (optional, for consistency)
Optional Additions:
• Camphor – a tiny pinch (for cooling and antimicrobial properties)
• Beeswax – a small amount (to make the kajal more solid and long-lasting)
• Activated charcoal – for added pigment if desired
Step-by-Step Method to Make Ayurvedic Kajal
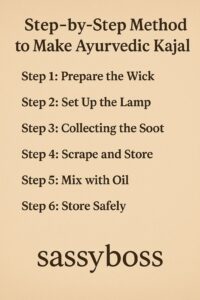
Step 1: Prepare the Wick
Soak a little piece of cotton in ghee after rolling it into a wick. For improved burning, you can also use a cotton wick from the market that has been soaked in ghee overnight.
Step 2: Set Up the Lamp
Put the wick dipped in ghee in the middle of your metal lamp or diya. In a place that is calm, undisturbed, and wind-free, light the wick.
Step 3: Collecting the Soot
To keep the flame from going out, hold a clean steel dish or bowl upside down over it. Keep it a short distance away. Give the flame 15 to 20 minutes to burn. The plate’s bottom will accumulate soot from the burning candle.
Tip: If you want to collect more soot, use two wicks or let it burn longer.
Step 4: Scrape and Store

Using a spoon or spatula, carefully scrape the soot into a small, clean container after the plate has cooled and enough soot has been collected.
Step 5: Mix with Oil
To create a smooth, creamy paste, mix a few drops of ghee, castor oil, or almond oil into the soot. To suit your tastes, change the consistency.
Optional: Add a pinch of camphor or a drop of vitamin E oil for added benefits.
Step 6: Store Safely

Place the kajal in a little, tightly sealed jar. Store it somewhere dry and cool. If stored correctly, it can last for several months.
Application Tips
• Use a clean fingertip or a kajal applicator stick to apply.
• For a more dramatic look, you can layer it.
• Always apply with clean hands or tools to avoid introducing bacteria.
Benefits of Ayurvedic Ingredients
Let’s take a closer look at the Ayurvedic benefits of some of the key ingredients used in this homemade kajal:
Ghee
In Ayurveda, ghee is referred to be a rasayana, or rejuvenator. Over time, it helps to improve eyesight by calming the eyes and reducing dryness.
Castor Oil
Castor oil, a natural anti-inflammatory, soothes and lessens eye redness. Additionally, it promotes the growth of eyelashes.
Camphor
Camphor has antibacterial qualities and has a cooling effect when used sparingly. Use sparingly, though, as too much will irritate the skin.
Almond Oil
Rich in Vitamin E, almond oil nourishes the skin around the eyes and helps in the growth of eyelashes.
Precautions & Tips
• Patch test first: Though natural, always test the kajal on your skin before applying near your eyes.
• Use clean tools: Hygiene is essential to prevent any infections.
• Store in a cool place: Avoid heat and sunlight exposure.
• Don’t share your kajal: To avoid contamination, use your own applicator or finger.
• If you experience irritation, discontinue use immediately.
Final Thoughts
Using Ayurvedic techniques to make kajal at home is a lovely way to combine sustainability, self-care, and heritage. It allows us to have control over what we put on our bodies in addition to connecting us with ancient wisdom. As a tiny, sacred ritual in your everyday routine, the practice itself can be grounding and calming.
Therefore, think about creating your own kajal stick the next time you grab for that store-bought one. It is nourishing, safer, and firmly anchored in traditional customs. That extra care and attention is something your eyes deserve.
Have you ever attempted to make your own kajal? Leave a comment below with your questions or experience! Remember to follow for more Ayurvedic advice and recipes for natural beauty.