Homemade Strawberry Jam in 3 Easy Steps
Making your own jam has a really fulfilling quality. It makes a jar full of flavor and affection, fills your kitchen with the aroma of fresh fruit, and gives you a taste of summer every single day.
This 3-step recipe for homemade strawberry jam will demonstrate that you don’t need a large list of ingredients or expensive equipment to make something genuinely unique, regardless of your level of experience in the kitchen.
You can make a sweet and tangy spread that’s ideal for toast, desserts, or even giving as a gift using just fresh strawberries, sugar, and lemon juice. Let’s begin!
Why Make Your Own Strawberry Jam?
Before diving into the steps, let’s talk about why homemade jam is worth it:
• Better Flavor: Fresh strawberries at peak ripeness have an unbeatable natural sweetness.
• No Preservatives: Store-bought jams often include additives and high-fructose corn syrup.
• Customizable: Adjust the sweetness, add spices (like vanilla or basil), or even mix fruits.
• Great for Gifting: A jar of homemade jam makes a thoughtful, delicious gift.
Ingredients You’ll Need
This recipe keeps it simple with just three core ingredients:
• Strawberries – 4 cups (about 2 pounds), hulled and chopped
Use ripe, sweet strawberries for the best flavor.
• Granulated sugar – 2 cups
Sugar helps preserve the jam and brings out the fruit’s natural juices.
• Lemon juice – 2 tablespoons (freshly squeezed)
Adds brightness and helps the jam set naturally by balancing pH.
Optional:
• A pinch of salt to enhance flavor
• A vanilla bean or ½ tsp vanilla extract for a richer taste
Equipment You’ll Need
• A heavy-bottomed saucepan
• A wooden spoon or spatula
• Potato masher (optional, for chunkier texture)
• Sterilized glass jars with lids
• Ladle and funnel (optional but helpful for filling jars)
Steps All Need:
Step 1: Prep the Strawberries

• Rinse, hull, and chop 4 cups of fresh strawberries.
• Place in a bowl and add 2 cups sugar and 2 tablespoons lemon juice.
• Let the mixture sit for 15–30 minutes to macerate and release juices.
• Optional: Lightly mash the strawberries for a smoother texture.
Step 2: Cook the Jam
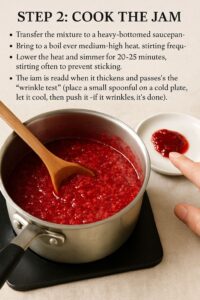
• Transfer the mixture to a heavy-bottomed saucepan.
• Bring to a boil over medium-high heat, stirring frequently.
• Lower the heat and simmer for 20–25 minutes, stirring often to prevent sticking.
• The jam is ready when it thickens and passes the “wrinkle test” (place a small spoonful on a cold plate, let it cool, then push it—if it wrinkles, it’s done).
Step 3: Jar and Store
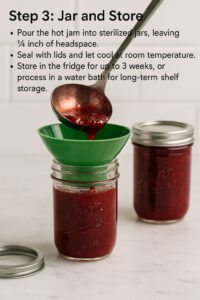
• Pour the hot jam into sterilized jars, leaving ¼ inch of headspace.
• Seal with lids and let cool at room temperature.
• Store in the fridge for up to 3 weeks, or process in a water bath for long-term shelf storage.
Tips for Success:
-
Use Ripe Strawberries: They provide the best flavor and natural sweetness.
-
Adjust Sugar to Taste: If you prefer a less sweet jam, start with less sugar and adjust as needed.
-
Lemon Juice: Not only adds a bright flavor but also helps in setting the jam by activating the natural pectin in strawberries.
-
Avoid Overcooking: Overcooked jam can become too thick and lose its fresh strawberry flavor.
Conclusion
Crafting your own strawberry jam not only allows you to enjoy the fresh taste of strawberries year-round but also gives you control over the ingredients, ensuring a healthier option compared to store-bought versions. This simple recipe requires minimal ingredients and effort, making it perfect for beginners and seasoned cooks alike. Whether spread on toast, paired with scones, or used as a filling for desserts, homemade strawberry jam adds a touch of sweetness to any dish.