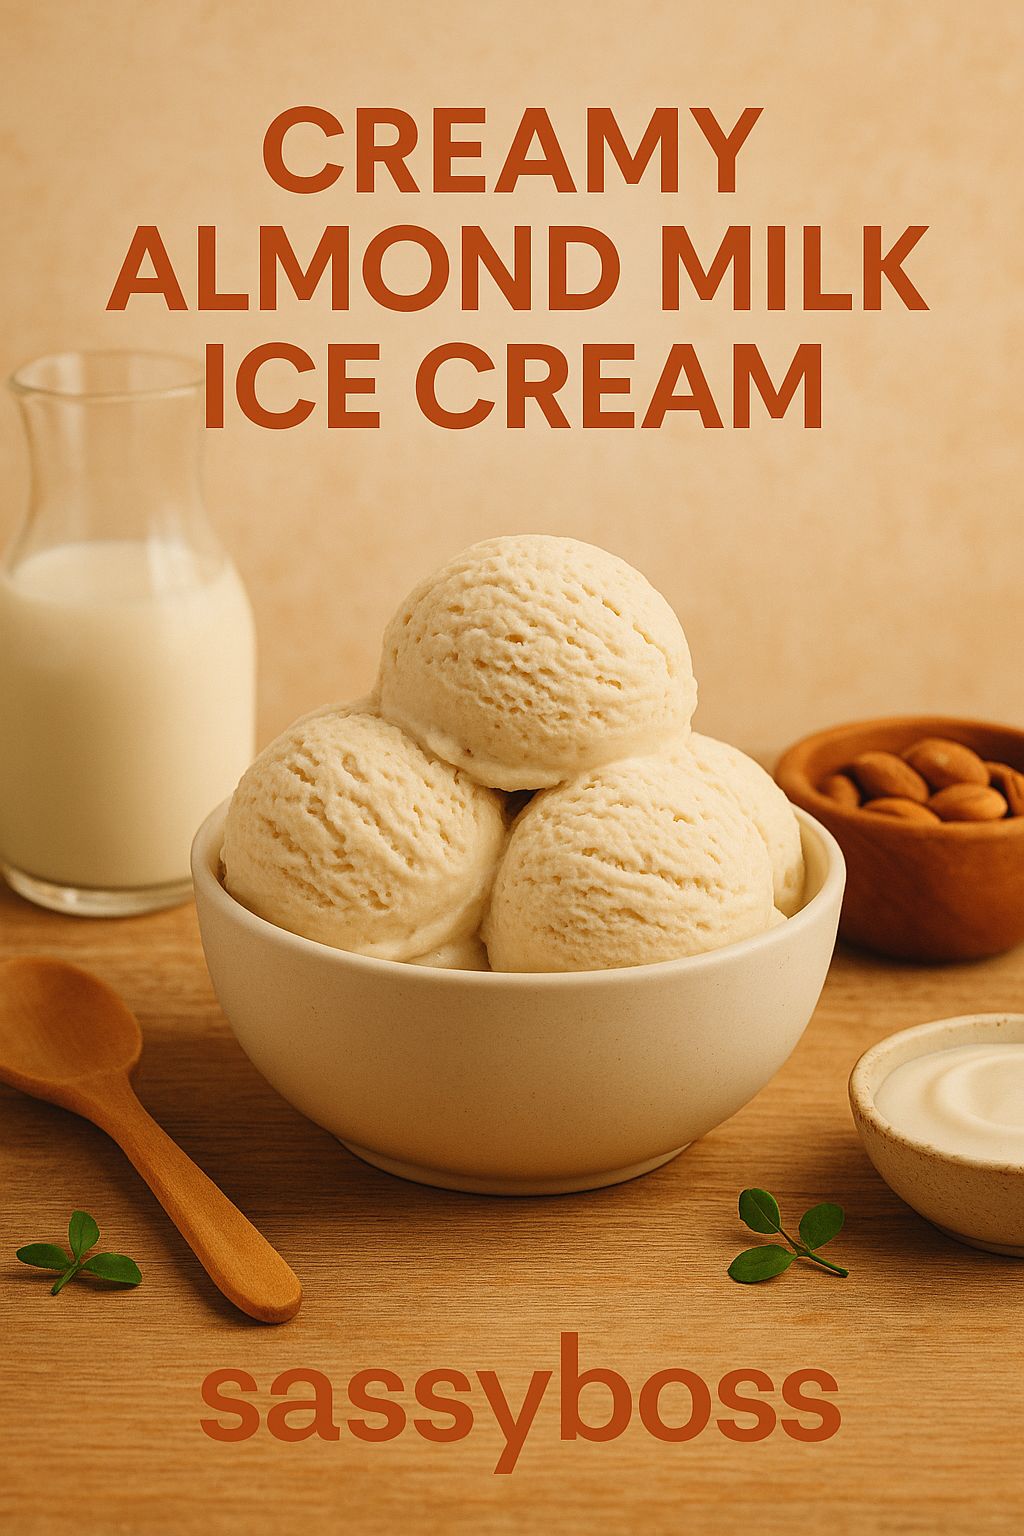
Creamy Almond Milk Ice Cream – Dairy-Free & Delicious!
On a hot day, or really any day, nothing compares to the cool, sweet comfort of ice cream. But conventional ice cream isn’t necessarily the ideal choice for those of us who are vegan, lactose intolerant, or just trying to reduce our dairy intake. The solution is almond milk ice cream, which is delicious, creamy, and completely dairy-free!
We’ll demonstrate how to make your own almond milk ice cream at home in this post. It’s really tasty, shockingly easy, and ideal for anyone who wants to indulge without sacrificing quality. This recipe is sure to please, regardless of your level of experience with plant-based diets or your general interest in healthier options.
#Why Almond Milk?
For good reason, almond milk has become a mainstay in many homes. It has a mild, nutty flavor that goes well with both savory and sweet recipes, and it is naturally lactose-free and low in calories. Almond milk is a fantastic base for ice cream and may be used in a variety of ways.
When combined with the correct components, almond milk can still produce a creamy texture even if it lacks the fat level of regular dairy cream, which gives conventional ice cream its richness.
#The Secret to Creamy Non-Dairy Ice Cream
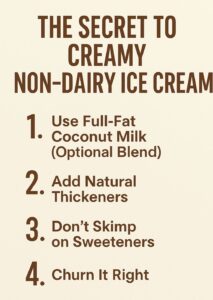
Texture is the most difficult aspect of creating dairy-free ice cream. The outcome can occasionally be overly hard or icy without the fat from milk and cream. But fear not—we have discovered a way to create rich, creamy, and scoopable almond milk ice cream.
Here’s how we do it:
1. Use Full-Fat Coconut Milk (Optional Blend)
A small amount of full-fat coconut milk adds richness without dominating the almond flavor, even though almond milk is our main component. For a lighter version, you may alternatively use only almond milk.
2. Add Natural Thickeners
To increase texture and avoid crystallization, use components like cornstarch, arrowroot starch, or a little amount of xanthan gum.
3. Don’t Skimp on Sweeteners
The combination remains soft thanks to liquid sweeteners like agave or maple syrup. Depending on your preferences, you can alternatively use coconut sugar or cane sugar.
4. Churn It Right
Making use of an ice cream machine has a significant impact. Air is added during the churning process, which contributes to the creamy consistency. Not in possession of an ice cream maker? We also have a no-churn solution below, so don’t worry!
#Ingredients You’ll Need
Here’s a basic recipe that you can customize to your liking.
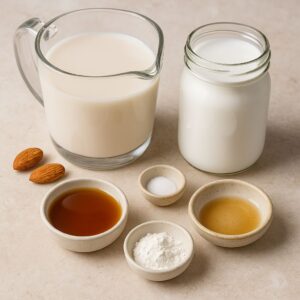
Base Ingredients:
• 2 cups unsweetened almond milk (homemade or store-bought)
• 1 cup full-fat coconut milk (for creaminess; can sub with more almond milk)
• 1/2 cup maple syrup or agave nectar
• 1.5 tsp vanilla extract
• 1 tbsp cornstarch or arrowroot powder (for thickening)
• Pinch of salt
Optional Add-ins:

• 1/4 cup chopped dark chocolate or vegan chocolate chips
• 1/4 cup toasted almonds or pecans
• Swirl of almond butter or fruit jam
• Fresh berries, cookie crumbles, or spices like cinnamon
#Step-by-Step Instructions
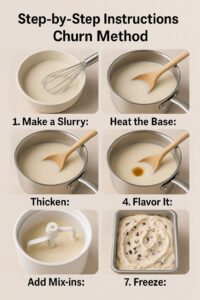
Churn Method:
1. Make a Slurry:
In a small bowl, mix the cornstarch with 2 tablespoons of almond milk to make a smooth slurry.
2. Heat the Base:
In a saucepan, combine the rest of the almond milk, coconut milk, maple syrup, and salt. Bring to a gentle simmer over medium heat.
3. Thicken:
Stir in the slurry and continue to cook for 5–7 minutes, stirring constantly, until the mixture thickens slightly. Remove from heat.
4. Flavor It:
Stir in vanilla extract. Let the mixture cool to room temperature, then chill in the refrigerator for at least 4 hours (or overnight).
5. Churn It:
Once the base is completely chilled, pour it into your ice cream maker and churn according to the manufacturer’s instructions (usually about 20–25 minutes).
6. Add Mix-ins:
If you’re adding chocolate chips, nuts, or other extras, fold them in once the ice cream is done churning.
7. Freeze:
Transfer to a freezer-safe container and freeze for 2–4 hours for a firmer texture. Let it sit at room temperature for a few minutes before scooping.
#No-Churn Method:
Don’t have an ice cream maker? No problem!
1. Follow the same steps through chilling the base.
2. Pour the chilled mixture into a shallow dish or loaf pan.
3. Place in the freezer and stir every 30–45 minutes for the first 2–3 hours to break up ice crystals.
4. Let it freeze fully for about 4–6 hours.
5. Let sit at room temperature for 5–10 minutes before scooping.
#Flavor Variations
This recipe is versatile, and you can easily modify it to suit your cravings. Here are a few tasty twists:
• Chocolate Almond Milk Ice Cream: Add 1/3 cup cocoa powder while heating the base.
• Strawberry Swirl: Fold in a homemade strawberry compote before freezing.
• Mocha Chip: Mix in a tablespoon of espresso powder and some chopped vegan chocolate.
• Salted Caramel Almond: Swirl in dairy-free caramel and a pinch of sea salt.
#Storage Tips
Store your almond milk ice cream in an airtight container in the coldest part of your freezer. It’s best enjoyed within 1–2 weeks, though let’s be honest—it probably won’t last that long!
If it becomes too hard, just leave it on the counter for 10 minutes before scooping.
#Why You’ll Love This Recipe

• Dairy-Free & Vegan: Perfect for those with dietary restrictions or lifestyle preferences.
• Customizable: Use the base and let your imagination run wild.
• Healthier Alternative: Lower in fat and calories than traditional ice cream.
• Guilt-Free Indulgence: You know exactly what’s going into your treat.
#Final Thoughts
The ideal illustration of how plant-based living does not need sacrificing your favorite foods is almond milk ice cream. A cup of delicious, creamy ice cream that rivals anything you’ll find at the shop can be prepared in your kitchen with the correct ingredients and methods.
This dish is a great place to start if you’re wanting to cut back on dairy, eat better, or simply try different flavors. You might never return to store-bought pints after giving it a try!
Have you given this recipe a try? Tell us about your favorite flavors and mix-ins by leaving a comment with your rendition. Remember to use the hashtag #AlmondMilkIceCreamLove when tagging your creations on social media!